Drywall dents are common household mishaps that can easily mar the beauty of your walls. However, fret not! With the right tools and techniques, you can swiftly patch up those dents and restore your wall’s flawless appearance.
Big holes in drywall (defined as anything more than 6 inches wide) are more challenging to repair than small holes. They’re too large for a repair like we did before, so you’ll need to buy a drywall panel and fix your hole with that. The one we’ll display was originally in our garage when we moved here. Someone may have smashed it with their automobile.
To fix these, you’ll need the following tools/materials:
- Drywall panel
- Pencil
- Yardstick
- Utility knife
- Serrated knife
- 150 grit sandpaper on a sanding block
- Power screwdriver
- Screws
- Mesh drywall tape
- Joint compound
- A bendy putty knife (having two makes it easier)
Before You Shop
Before You Go Shopping, Consider the following things and arrange your purchases accordingly:
Determine if you want to repaint the entire wall or mend portions. If fixing tiny nail holes, use a delicate cloth to dab touch-up paint on the patches.
If you’re repairing many holes and other damage, prime the patched walls first, especially if you’re going for a semi-gloss or glossy finish. The greater the gloss, the more distinct the surface textures between the patch and the surrounding paint look.
Step 1: Cut Out Damaged Drywall for New Drywall

To begin, cut a hole around your hole. This seems illogical, but it will allow you to patch it with a piece of your purchased drywall panel.
Our hole was huge, and the panel we purchased was 2 ft by 2 ft, so we drew it over the hole to ensure it would fit.
You’d do things differently if your hole were manageable. You would cut a square around your hole, then cut a piece of drywall panel the same size.
You may either measure your square hole and then cut off what you need from the drywall piece, or you can trace the square you cut out onto your drywall piece if it is still intact.
That’s probably simpler to do than describe in words, so I hope that was clear. The result should be a square hole in your wall and a square piece of drywall that can be inserted into said hole. We used a yardstick and a utility knife to score along our line after we had the contour of our square. One person should hold the yardstick while the other cuts.
Then, we used our serrated knife to hack through the drywall.
After you’ve cut it, you may peel out the drywall bits to leave a clean square.
Because your cut will have a rough edge, sand it with 150-grit sandpaper and wipe away dust with a paper towel.
Step 2: Attach New Drywall

It’s now time to put your drywall repair in place. It would help if you secured it to something sturdy. You can screw it into studs if you have them behind your hole, like we did.
If you don’t have studs, take a piece of 14 and fasten it inside the hole to the rear of the drywall using 1-1/4′′ drywall screws. Then, rather than putting your drywall into the studs, screw it into that.
So, we inserted our drywall patch into the hole we had created and bolted it into the studs on both sides. We installed three screws on the left and three screws on the right.
Step 3: Mesh Drywall Tape and Joint Compound

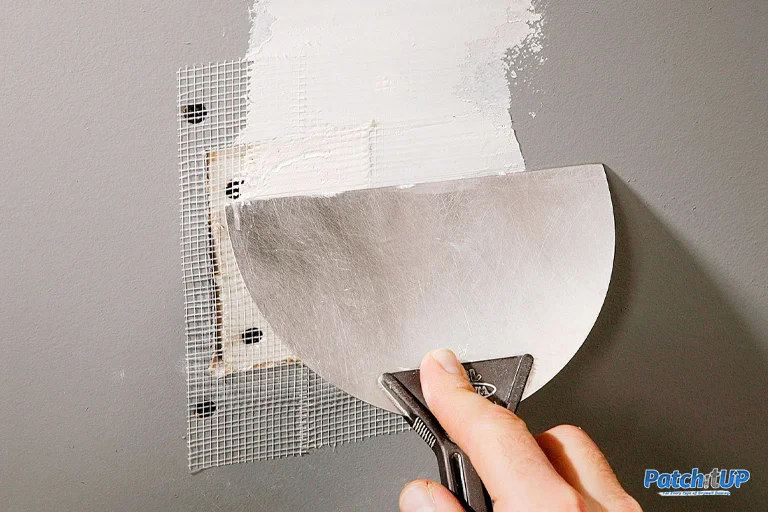
The mesh drywall tape was then used around the fix’s four sides. It is available on a roll and is mildly sticky. It aids in the adhesion of the joint compound to the gaps.
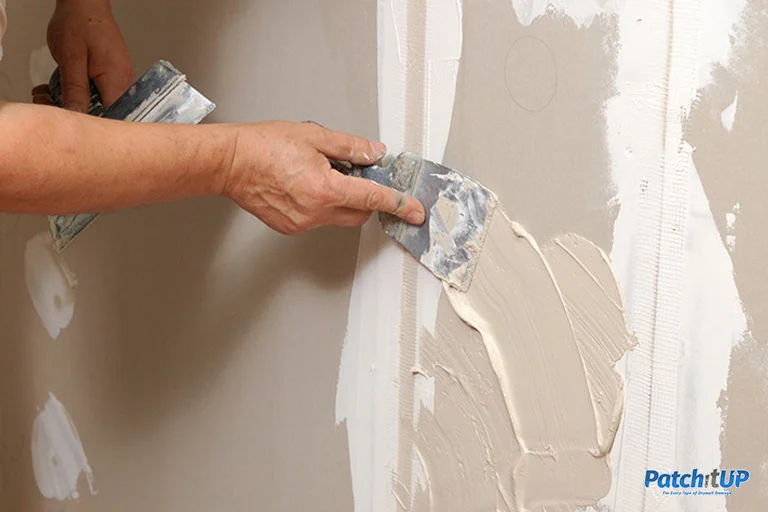
Apply some joint compound to your putty knife and feather it away from the patch, being sure to travel at least a couple of inches past it. Allow this to dry overnight before returning to apply a second layer. You’ll repeat the previous stages. First, sand and wash away any rough spots. After that, add a second coat of joint compound. This time, feather the edges slightly beyond your first application.
Most internet guides advise you to apply a third coat as well. We’d do three if this were within our house or in an area covered by something other than shelves/pegboards/various other storage items. But for our garage, we determined that two was plenty.
Step 4: Paint, Finish, and Enjoy!
After successfully patching up those drywall dents, the final steps involve painting and finishing to seamlessly blend the repaired area with the rest of the wall.
Preparing for Painting
Choose the Right Paint
- Color Match: Select paint that matches the existing wall color to ensure a uniform finish.
- Finish: Consider the sheen or finish of the paint (e.g., matte, satin, semi-gloss) to match the surrounding area.
Gather Painting Supplies
- Paint Brushes or Rollers: Depending on the area to be painted.
- Drop Cloths: Protect the floor and nearby furniture from paint splatters.
Painting the Patched Area
Apply Primer (If Needed)
- Priming Purpose: A primer helps the paint adhere better and ensures a consistent color.
- Primer Application: Use a brush or roller to apply primer evenly over the patched area.
Painting Technique
- Start Painting: Trimming the patched area with a brush, then fill in the rest using a roller for a uniform finish.
- Multiple Coats: Apply multiple thin coats rather than one thick coat for better coverage.
Finishing Touches
Blending with Surrounding Wall
- Feathering Technique: Blend the edges of the painted area with the existing wall to create a seamless transition.
- Event Coverage: Ensure the paint coverage matches the surrounding wall for a natural look.
Final Inspection
- Check for Uniformity: Examine the patched area from different angles to confirm the color and texture match.
Enjoy Your Renewed Wall
Let it Dry
- Drying Time: The manufacturer recommends that the paint dry completely before touching or adding further coats.
Admire the Results
- Appreciate Your Work: Step back and admire your beautifully repaired and painted wall!
Final Thoughts
Repairing drywall dents may seem daunting, but armed with the right tools and techniques, it’s a manageable task. Each step contributes to restoring your wall’s pristine appearance, from cutting out damaged sections to meticulously applying joint compound and paint.
Remember, precision is critical. Take your time to ensure each layer of joint compound is feathered smoothly and the paint seamlessly blends with the surrounding wall. It’s not just about fixing a dent; it’s about making it disappear.
Don’t rush the process. Patience pays off in achieving a professional finish. And once you step back to admire your flawless wall, the satisfaction of a well-done job makes every effort worthwhile.
So, whether it’s a minor blemish or a more extensive repair, mastering these quick fixes empowers you to keep your walls looking impeccable without needing professional help. Your home’s beauty is in your capable hands!
Feel free to adjust it to match the tone and style of your guide better!
FAQs
Q. What causes drywall dents?
A. Drywall dents often occur due to accidental impacts, furniture collisions, or even the simple wear and tear of daily life. They’re typically caused by objects hitting the wall’s surface, leaving behind indentations or holes.
Q. Can I repair minor dents without replacing the drywall?
A. minor dents and nail holes can be easily repaired without replacing the entire drywall sheet. Fillers like joint compounds can effectively patch these minor imperfections.
How do I know when a dent requires professional repair?
A. It might be best to consult a professional if the damage is extensive, like a giant hole or severe structural damage. They have the expertise to handle major repairs that might involve replacing larger sections of drywall.
Q. Is it necessary to repaint the entire wall after repairing a dent?
A. you can often touch up the paint only on the repaired area for minor repairs, especially nail holes. However, for more extensive repairs or if you’re looking for a flawless finish, repainting the entire wall might be necessary for a uniform look.
Q. What’s the best way to match paint colors after dent repair?
A. Take a sample of the existing paint or note down the color code to get the closest match at the hardware store. When applying the new paint, ensure it blends seamlessly by feathering the edges and using the same sheen as the existing wall.
Q. How long does the joint compound dry before sanding take?
A. Typically, joint compound takes around 24 hours to dry completely. It’s crucial to allow it ample time to ensure a smooth finish.
Q. Can I use spackling paste instead of joint compound for minor repairs?
A. Spackling paste is suitable for minimal repairs, like nail holes. However, a joint compound is better suited for larger dents or holes due to its durability and ability to fill larger spaces.
Q. Should I use mesh tape for all repairs?
A. Mesh tape is recommended for reinforcing seams and more extensive repairs as it helps prevent cracks from reappearing. For tiny holes, a couple of layers of joint compound might suffice without the need for mesh tape.
Q. What safety precautions should I take when repairing drywall?
A. Ensure proper ventilation and use a dust mask while sanding to avoid inhaling drywall dust. Additionally, use appropriate safety gear, especially when working with power tools.
Q. How long should I wait before painting after the repair?
A. It’s advisable to wait for the joint compound to dry thoroughly before applying primer and paint. Depending on the humidity and thickness of the compound, this could take anywhere from 24 to 48 hours.


Leave a Reply